|
|
| (10 intermediate revisions by the same user not shown) |
| Line 1: |
Line 1: |
| {{SCP|Hunter}}Hunter is a skill in which players catch different animals and creatures in Zeah. Although Hunter is a non-combat skill, players can still be damaged while hunting. Using hunting equipment bought from hunter stores, players can hunt specific creatures obtaining rewards such as spotted kebbit fur for spotted cape, chinchompas, and the fabled Dragon and Kingly [[Impling|implings]]. | | {{SCP|Hunter}}Hunter is a skill in which players catch different animals and creatures in Zeah. Although Hunter is a non-combat skill, players can still be damaged while hunting. Using hunting equipment bought from hunter stores, players can hunt specific creatures obtaining rewards such as spotted kebbit fur for spotted cape, chinchompas, and the fabled Dragon and Kingly [[Impling|implings]]. |
|
| |
|
| We highly advise getting [[File:Silver_Huntsman.png]] Silver Huntsman relic before beginning to train Hunter, as it increases the number of traps you can place by one and your traps no longer collapse if a catch is failed. | | We highly advise getting [[File:Silver_Huntsman.png]] [[Relic|Silver Huntsman]] relic before beginning to train Hunter, as it increases the number of traps you can place by one and your traps no longer collapse if a catch is failed. |
|
| |
|
| __TOC__ | | __TOC__ |
| Line 33: |
Line 33: |
| |6 | | |6 |
| |} | | |} |
| | |
|
| |
|
| ===Required items=== | | ===Required items=== |
| *[[File:Bird snare.png]] Bird snares if opting to catch birds for levels 1-43. | | *[[File:Bird snare.png]] Bird snares if opting to catch birds for levels 1-43. |
| *[[File:Box trap.png]] Box trap for chinchompas and grenwalls, starting at level 63. | | *[[File:Box trap.png]] Box trap for chinchompas and grenwalls, starting at level 63. |
| | |
| | |
| | |
| | ===Suggested items=== |
| | *[[File:Bird house.png]] Bird houses allow for passive Hunter training. These are not necessary in progressing the skill, but definitely recommended. More on this can be found '''[[Bird house trapping|HERE]]'''. |
| | |
| | |
| | ==Birdhouses== |
| | [[File:Redwood bird house.png]] Birdhouses are a way to passively train {{SCP|Hunter}} Hunter. All you have to do is place the Birdhouse, put a few seeds inside, then wait 30 minutes for the Birds to trap. From level 5 onwards you should consistently be doing Birdhouses. See the [[Bird house trapping|Bird House Trapping]] article for more information. |
| | |
|
| |
|
| ==Training Hunter== | | ==Training Hunter== |
|
| |
|
| ===Levels 1-43: Crimson Swifts=== | | ===Levels 1 - 43: Crimson Swifts=== |
| [[File:Crimson swift icon.png]] Crimson Swifts are located east of the Feldip Hunter Area by the shore. Utilize the [[Teleport Nexus]], search 'Feldip Hunter Area', and run far east to the shore. You need a Bird snare to catch them. | | [[File:Crimson swift icon.png]] Crimson Swifts are located east of the Feldip Hunter Area by the shore. Utilize the [[Teleport Nexus]], search 'Feldip Hunter Area', and run far east to the shore. You need a Bird snare to catch them. |
| <br> | | <br> |
| Line 46: |
Line 57: |
| <br> | | <br> |
|
| |
|
| ===Levels 43–63: Falconry=== | | ===Levels 43 – 63: Falconry=== |
| [[File:Spotted kebbit icon.png]] Catching spotted kebbits (and [[File:Dark kebbit icon.png]] dark kebbits at level 57) using the [[Falconry]] technique offers the fastest experience from level 43 to 63. They are located in the Piscatoris Falconry area. While this provides higher experience rates than catching lizards, it is also more click-intensive. For more information on how [[Falconry]] works click '''[[Falconry|HERE]]'''. | | [[File:Spotted kebbit icon.png]] Catching spotted kebbits (and [[File:Dark kebbit icon.png]] dark kebbits at level 57) using the [[Falconry]] technique offers the fastest experience from level 43 to 63. They are located in the Piscatoris Falconry area. While this provides higher experience rates than catching lizards, it is also more click-intensive. For more information on how [[Falconry]] works click '''[[Falconry|HERE]]'''. |
| [[File:Falconry.png|thumb|right|Player Hunting Spotted Kebbits through Falconry]] | | [[File:Falconry.png|thumb|right|Player Hunting Spotted Kebbits through Falconry]] |
| <br> | | <br> |
|
| |
|
| ===Levels 63-77: Red chinchompas=== | | ===Levels 63 - 77: Red chinchompas=== |
| [[File:Red chinchompa.png]] Hunting carnivorous chinchompas offers relatively fast Hunter experience for players who do not wish to hunt [[File:Black chinchompa.png]] black chinchompas in the Wilderness from 73 to 77. The Gwenith Hunter area is the best location to hunt red chinchompas. Utilize the [[Teleport Nexus]], search 'Gwenith Hunter Area', and run a few tiles east. | | [[File:Red chinchompa.png]] Hunting carnivorous chinchompas offers relatively fast Hunter experience for players who do not wish to hunt [[File:Black chinchompa.png]] black chinchompas in the Wilderness from 73 to 77. The Gwenith Hunter area is the best location to hunt red chinchompas. Utilize the [[Teleport Nexus]], search 'Gwenith Hunter Area', and run a few tiles east. |
| <br> | | <br> |
| Line 57: |
Line 68: |
|
| |
|
|
| |
|
| ===Levels 77-99: Grenwalls=== | | ===Levels 77 - 99: Grenwalls=== |
| Catching [[File:Grenwall icon.webp]] Grenwalls requiring a Hunter level of 77 to catch and offer the fastest experience. You will need box traps in order to catch them. The best location to hunt these at is the Platinum+ Donator Zone. However, for those without the donator rank you can hunt them south of Prifddinas, teleport to them through the [[Portal nexus]]. | | Catching [[File:Grenwall icon.webp]] Grenwalls requiring a Hunter level of 77 to catch and offer the fastest experience. You will need box traps in order to catch them. The best location to hunt these at is the Platinum+ Donator Zone. However, for those without the donator rank utilize the [[Teleport Nexus]], search "Isafdar Hunter Area", and begin trapping. |
| | <br> |
| | [[File:Playergrenwall.png|thumb|Player Hunting Grenwalls at the Isafdar Hunter Area]] |
|
| |
|
|
| |
|
| ==Implings== | | ==Implings== |
| Implings can be caught inside puro-puro. They are mostly known not as an effective training method, but for the variety of loot they reward upon catch. See the [[Impling|implings]] article for more details. | | [[File:01 Baby impling.png]] Implings can be caught inside puro-puro. They are mostly known not as an effective training method, but for the variety of loot they reward upon catch. See the [[Impling|implings]] article for more details regarding rewards. |
| ==Impling Loot DB==
| |
| <tabber>
| |
| Beginner (1-30)=
| |
| <center>
| |
| {| class="wikitable sortable" id="tab_alternatingtable" style="display: inline-table; margin-right:20px;"
| |
| |+[[File:01 Baby impling.png]] Baby Impling (lvl 17)
| |
| |-
| |
| ! '''Loot'''
| |
| ! '''Min'''
| |
| ! '''Max'''
| |
| |-
| |
| |Chisel
| |
| |1
| |
| |1
| |
| |-
| |
| |-
| |
| |Thread
| |
| |1
| |
| |1
| |
| |-
| |
| |-
| |
| |Needle
| |
| |1
| |
| |1
| |
| |-
| |
| |-
| |
| |Knife
| |
| |1
| |
| |1
| |
| |-
| |
| |-
| |
| |Cheese
| |
| |1
| |
| |1
| |
| |-
| |
| |-
| |
| |Hammer
| |
| |1
| |
| |1
| |
| |-
| |
| |-
| |
| |Ball of Wool
| |
| |1
| |
| |1
| |
| |-
| |
| |-
| |
| |Spice
| |
| |1
| |
| |1
| |
| |-
| |
| |-
| |
| |Flax
| |
| |1
| |
| |1
| |
| |-
| |
| |-
| |
| |Mud Pie
| |
| |1
| |
| |1
| |
| |-
| |
| |-
| |
| |Seaweed
| |
| |1
| |
| |1
| |
| |-
| |
| |-
| |
| |Air Talisman
| |
| |1
| |
| |1
| |
| |-
| |
| |-
| |
| |Silver Bar
| |
| |1
| |
| |1
| |
| |-
| |
| |-
| |
| |Sapphire
| |
| |1
| |
| |1
| |
| |-
| |
| |-
| |
| |Hard Leather
| |
| |1
| |
| |1
| |
| |-
| |
| |-
| |
| |Lobster
| |
| |1
| |
| |1
| |
| |-
| |
| |-
| |
| |Soft Clay
| |
| |1
| |
| |1
| |
| |-
| |
| |}
| |
| {| class="wikitable sortable" id="tab_alternatingtable" style="display: inline-table; margin-right:20px;"
| |
| |+[[File:02 Young impling.png]] Young Impling (lvl 22)
| |
| |-
| |
| ! '''Loot'''
| |
| ! '''Min'''
| |
| ! '''Max'''
| |
| |-
| |
| |-
| |
| |Steel Nails
| |
| |5
| |
| |5
| |
| |-
| |
| |-
| |
| |Lockpick
| |
| |1
| |
| |1
| |
| |-
| |
| |-
| |
| |Pure Essence
| |
| |1
| |
| |1
| |
| |-
| |
| |-
| |
| |Tuna
| |
| |1
| |
| |1
| |
| |-
| |
| |-
| |
| |Chocolate Slice
| |
| |1
| |
| |1
| |
| |-
| |
| |-
| |
| |Steel Axe
| |
| |1
| |
| |1
| |
| |-
| |
| |-
| |
| |Meat Pizza
| |
| |1
| |
| |1
| |
| |-
| |
| |-
| |
| |Coal
| |
| |1
| |
| |1
| |
| |-
| |
| |-
| |
| |Bow String
| |
| |1
| |
| |1
| |
| |-
| |
| |-
| |
| |Snape Grass
| |
| |1
| |
| |1
| |
| |-
| |
| |-
| |
| |Soft Clay
| |
| |1
| |
| |1
| |
| |-
| |
| |-
| |
| |Studded Chaps
| |
| |1
| |
| |1
| |
| |-
| |
| |-
| |
| |Steel Full Helm
| |
| |1
| |
| |1
| |
| |-
| |
| |-
| |
| |Oak Plank
| |
| |1
| |
| |1
| |
| |-
| |
| |-
| |
| |Defence Potion (3)
| |
| |1
| |
| |1
| |
| |-
| |
| |-
| |
| |Mithril Bar
| |
| |1
| |
| |1
| |
| |-
| |
| |-
| |
| |Yew Longbow
| |
| |1
| |
| |1
| |
| |-
| |
| |-
| |
| |Garden Pie
| |
| |1
| |
| |1
| |
| |-
| |
| |-
| |
| |Jangerberries
| |
| |1
| |
| |1
| |
| |-
| |
| |}
| |
| {| class="wikitable sortable" id="tab_alternatingtable" style="display: inline-table; margin-right:20px;"
| |
| |+[[File:03 Gourmet impling.png]] Gourmet Impling (lvl 28)
| |
| |-
| |
| ! '''Loot'''
| |
| ! '''Min'''
| |
| ! '''Max'''
| |
| |-
| |
| |-
| |
| |Tuna
| |
| |1
| |
| |1
| |
| |-
| |
| |-
| |
| |Bass
| |
| |1
| |
| |1
| |
| |-
| |
| |-
| |
| |Curry
| |
| |1
| |
| |1
| |
| |-
| |
| |-
| |
| |Meat Pie
| |
| |1
| |
| |1
| |
| |-
| |
| |-
| |
| |Chocolate Cake
| |
| |1
| |
| |1
| |
| |-
| |
| |-
| |
| |Frog Spawn
| |
| |1
| |
| |1
| |
| |-
| |
| |-
| |
| |Spice
| |
| |1
| |
| |1
| |
| |-
| |
| |-
| |
| |Curry Leaf
| |
| |1
| |
| |1
| |
| |-
| |
| |-
| |
| |Ugthanki Kebab
| |
| |1
| |
| |1
| |
| |-
| |
| |-
| |
| |Lobster
| |
| |5
| |
| |5
| |
| |-
| |
| |-
| |
| |Shark
| |
| |4
| |
| |4
| |
| |-
| |
| |-
| |
| |Fish Pie
| |
| |1
| |
| |1
| |
| |-
| |
| |-
| |
| |Chef's Delight
| |
| |1
| |
| |1
| |
| |-
| |
| |-
| |
| |Rainbow Fish
| |
| |6
| |
| |6
| |
| |-
| |
| |-
| |
| |Garden Pie
| |
| |7
| |
| |7
| |
| |-
| |
| |-
| |
| |Swordfish
| |
| |4
| |
| |4
| |
| |-
| |
| |-
| |
| |Strawberries
| |
| |1
| |
| |1
| |
| |-
| |
| |-
| |
| |Cooked Karambwan
| |
| |3
| |
| |3
| |
| |-
| |
| |}
| |
| </center>
| |
| | |
| |-|
| |
| | |
| Low Level (31-50)=
| |
| <center>
| |
| {| class="wikitable sortable" id="tab_alternatingtable" style="display: inline-table; margin-right:20px;"
| |
| |+[[File:04 Earth impling.png]] Earth Impling (lvl 36)
| |
| |-
| |
| ! '''Loot'''
| |
| ! '''Min'''
| |
| ! '''Max'''
| |
| |-
| |
| |-
| |
| |Fire Talisman
| |
| |1
| |
| |1
| |
| |-
| |
| |-
| |
| |Earth Talisman
| |
| |1
| |
| |1
| |
| |-
| |
| |-
| |
| |Earth Tiara
| |
| |1
| |
| |1
| |
| |-
| |
| |-
| |
| |Earth Rune
| |
| |40
| |
| |40
| |
| |-
| |
| |-
| |
| |Mithril Ore
| |
| |1
| |
| |1
| |
| |-
| |
| |-
| |
| |Bucket of Sand
| |
| |5
| |
| |5
| |
| |-
| |
| |-
| |
| |Unicorn Horn
| |
| |1
| |
| |1
| |
| |-
| |
| |-
| |
| |Compost
| |
| |7
| |
| |7
| |
| |-
| |
| |-
| |
| |Gold Ore
| |
| |1
| |
| |1
| |
| |-
| |
| |-
| |
| |Steel Bar
| |
| |1
| |
| |1
| |
| |-
| |
| |-
| |
| |Mithril Pickaxe
| |
| |1
| |
| |1
| |
| |-
| |
| |-
| |
| |Wildblood Seed
| |
| |2
| |
| |2
| |
| |-
| |
| |-
| |
| |Jangerberry Seed
| |
| |2
| |
| |2
| |
| |-
| |
| |-
| |
| |Supercompost
| |
| |3
| |
| |3
| |
| |-
| |
| |-
| |
| |Mithril Ore
| |
| |4
| |
| |4
| |
| |-
| |
| |-
| |
| |Harralander Seed
| |
| |3
| |
| |3
| |
| |-
| |
| |-
| |
| |Coal
| |
| |7
| |
| |7
| |
| |-
| |
| |-
| |
| |Emerald
| |
| |1
| |
| |1
| |
| |-
| |
| |-
| |
| |Ruby
| |
| |1
| |
| |1
| |
| |-
| |
| |}
| |
| {| class="wikitable sortable" id="tab_alternatingtable" style="display: inline-table; margin-right:20px;"
| |
| |+[[File:05 Essence impling.png]] Essence Impling (lvl 42)
| |
| |-
| |
| ! '''Loot'''
| |
| ! '''Min'''
| |
| ! '''Max'''
| |
| |-
| |
| |-
| |
| |Pure Essence
| |
| |25
| |
| |25
| |
| |-
| |
| |-
| |
| |Water Rune
| |
| |35
| |
| |35
| |
| |-
| |
| |-
| |
| |Air Rune
| |
| |35
| |
| |35
| |
| |-
| |
| |-
| |
| |Fire Rune
| |
| |55
| |
| |55
| |
| |-
| |
| |-
| |
| |Mind Rune
| |
| |30
| |
| |30
| |
| |-
| |
| |-
| |
| |Body Rune
| |
| |30
| |
| |30
| |
| |-
| |
| |-
| |
| |Chaos Rune
| |
| |5
| |
| |5
| |
| |-
| |
| |-
| |
| |Cosmic Rune
| |
| |5
| |
| |5
| |
| |-
| |
| |-
| |
| |Mind Talisman
| |
| |1
| |
| |1
| |
| |-
| |
| |-
| |
| |Lava Rune
| |
| |5
| |
| |5
| |
| |-
| |
| |-
| |
| |Mud Rune
| |
| |5
| |
| |5
| |
| |-
| |
| |-
| |
| |Smoke Rune
| |
| |5
| |
| |5
| |
| |-
| |
| |-
| |
| |Steam Rune
| |
| |5
| |
| |5
| |
| |-
| |
| |-
| |
| |Death Rune
| |
| |15
| |
| |15
| |
| |-
| |
| |-
| |
| |Law Rune
| |
| |15
| |
| |15
| |
| |-
| |
| |-
| |
| |Blood Rune
| |
| |10
| |
| |10
| |
| |-
| |
| |-
| |
| |Soul Rune
| |
| |15
| |
| |15
| |
| |-
| |
| |-
| |
| |Nature Rune
| |
| |15
| |
| |15
| |
| |-
| |
| |}
| |
| {| class="wikitable sortable" id="tab_alternatingtable" style="display: inline-table; margin-right:20px;"
| |
| |+[[File:06 Eclectic impling.png]] Eclectic Impling (lvl 50)
| |
| |-
| |
| ! '''Loot'''
| |
| ! '''Min'''
| |
| ! '''Max'''
| |
| |-
| |
| |-
| |
| |Mithril Pickaxe
| |
| |1
| |
| |1
| |
| |-
| |
| |-
| |
| |Curry Leaf
| |
| |1
| |
| |1
| |
| |-
| |
| |-
| |
| |Snape Grass
| |
| |1
| |
| |1
| |
| |-
| |
| |-
| |
| |Air Rune
| |
| |35
| |
| |60
| |
| |-
| |
| |-
| |
| |Oak Plank
| |
| |5
| |
| |5
| |
| |-
| |
| |-
| |
| |Empty Candle Lantern
| |
| |1
| |
| |1
| |
| |-
| |
| |-
| |
| |Gold Ore
| |
| |1
| |
| |1
| |
| |-
| |
| |-
| |
| |Gold Bar
| |
| |5
| |
| |5
| |
| |-
| |
| |-
| |
| |Unicorn Horn
| |
| |1
| |
| |1
| |
| |-
| |
| |-
| |
| |Adamant Kiteshield
| |
| |1
| |
| |1
| |
| |-
| |
| |-
| |
| |Blue D'hide Chaps
| |
| |1
| |
| |1
| |
| |-
| |
| |-
| |
| |Red Spiky Vambraces
| |
| |1
| |
| |1
| |
| |-
| |
| |-
| |
| |Rune Dagger
| |
| |1
| |
| |1
| |
| |-
| |
| |-
| |
| |Battlestaff
| |
| |1
| |
| |1
| |
| |-
| |
| |-
| |
| |Adamantite Ore
| |
| |12
| |
| |12
| |
| |-
| |
| |-
| |
| |Slayer's Respite
| |
| |2
| |
| |2
| |
| |-
| |
| |-
| |
| |Wild Pie
| |
| |1
| |
| |1
| |
| |-
| |
| |-
| |
| |Watermelon Seed
| |
| |5
| |
| |5
| |
| |-
| |
| |-
| |
| |Diamond
| |
| |1
| |
| |1
| |
| |-
| |
| |}
| |
| </center>
| |
| | |
| |-|
| |
| Medium Level (51-79)=
| |
| <center>
| |
| {| class="wikitable sortable" id="tab_alternatingtable" style="display: inline-table; margin-right:20px;"
| |
| |+[[File:07 Spirit impling.png]] Spirit Impling (lvl 54)
| |
| |-
| |
| ! '''Loot'''
| |
| ! '''Min'''
| |
| ! '''Max'''
| |
| |-
| |
| |-
| |
| |Bronze Bar
| |
| |6
| |
| |6
| |
| |-
| |
| |-
| |
| |Iron Bar
| |
| |5
| |
| |5
| |
| |-
| |
| |-
| |
| |Bronze Claw
| |
| |6
| |
| |10
| |
| |-
| |
| |-
| |
| |Gold Ring
| |
| |8
| |
| |10
| |
| |-
| |
| |-
| |
| |Pouch
| |
| |30
| |
| |30
| |
| |-
| |
| |-
| |
| |Raw Rat Meat
| |
| |25
| |
| |25
| |
| |-
| |
| |-
| |
| |Raw Chicken
| |
| |12
| |
| |20
| |
| |-
| |
| |-
| |
| |Raw Bird Meat
| |
| |5
| |
| |10
| |
| |-
| |
| |-
| |
| |Raw Beef
| |
| |11
| |
| |11
| |
| |-
| |
| |-
| |
| |Raw Thin Snail
| |
| |5
| |
| |5
| |
| |-
| |
| |-
| |
| |Spider Carcass
| |
| |1
| |
| |1
| |
| |-
| |
| |-
| |
| |Proboscis
| |
| |1
| |
| |1
| |
| |-
| |
| |-
| |
| |Wolf Bones
| |
| |5
| |
| |5
| |
| |-
| |
| |-
| |
| |Honeycomb
| |
| |10
| |
| |10
| |
| |-
| |
| |-
| |
| |Compost
| |
| |12
| |
| |15
| |
| |-
| |
| |-
| |
| |Marigolds
| |
| |1
| |
| |1
| |
| |-
| |
| |-
| |
| |Carved Evil Turnip
| |
| |1
| |
| |1
| |
| |-
| |
| |-
| |
| |Willow Logs
| |
| |40
| |
| |70
| |
| |-
| |
| |-
| |
| |Potato Cactus
| |
| |1
| |
| |5
| |
| |-
| |
| |-
| |
| |Clean Guam
| |
| |4
| |
| |4
| |
| |-
| |
| |-
| |
| |Tinderbox
| |
| |10
| |
| |30
| |
| |-
| |
| |-
| |
| |Harpoon
| |
| |10
| |
| |15
| |
| |-
| |
| |-
| |
| |Chinchompa
| |
| |5
| |
| |5
| |
| |-
| |
| |-
| |
| |Mithril Bar
| |
| |1
| |
| |1
| |
| |-
| |
| |-
| |
| |Adamant Bar
| |
| |1
| |
| |1
| |
| |-
| |
| |-
| |
| |Steel Bar
| |
| |3
| |
| |6
| |
| |-
| |
| |-
| |
| |Larupia Fur
| |
| |1
| |
| |1
| |
| |-
| |
| |-
| |
| |Kyatt Fur
| |
| |1
| |
| |1
| |
| |-
| |
| |-
| |
| |Tortoise Shell
| |
| |1
| |
| |1
| |
| |-
| |
| |-
| |
| |Swamp Toad
| |
| |5
| |
| |5
| |
| |-
| |
| |-
| |
| |Pot of Flour
| |
| |15
| |
| |20
| |
| |-
| |
| |-
| |
| |Willow Branch
| |
| |3
| |
| |3
| |
| |-
| |
| |-
| |
| |Banana
| |
| |20
| |
| |25
| |
| |-
| |
| |-
| |
| |Bagged Plant 1
| |
| |3
| |
| |3
| |
| |-
| |
| |-
| |
| |Red Flowers
| |
| |1
| |
| |1
| |
| |-
| |
| |-
| |
| |Ruby Harvest
| |
| |2
| |
| |5
| |
| |-
| |
| |-
| |
| |Fishbowl
| |
| |5
| |
| |5
| |
| |-
| |
| |-
| |
| |Granite (500g)
| |
| |5
| |
| |5
| |
| |-
| |
| |-
| |
| |Fire Talisman
| |
| |1
| |
| |1
| |
| |-
| |
| |-
| |
| |Air Talisman
| |
| |5
| |
| |5
| |
| |-
| |
| |-
| |
| |Goat Horn Dust
| |
| |3
| |
| |3
| |
| |-
| |
| |-
| |
| |Polar Kebbit Fur
| |
| |1
| |
| |1
| |
| |-
| |
| |-
| |
| |Raw Shark
| |
| |1
| |
| |1
| |
| |-
| |
| |-
| |
| |Rune Bar
| |
| |1
| |
| |1
| |
| |-
| |
| |-
| |
| |Iron Platebody
| |
| |5
| |
| |5
| |
| |-
| |
| |-
| |
| |Raw Rabbit
| |
| |5
| |
| |6
| |
| |-
| |
| |-
| |
| |Yak Hide
| |
| |5
| |
| |10
| |
| |-
| |
| |-
| |
| |Dagannoth Hide
| |
| |1
| |
| |1
| |
| |-
| |
| |-
| |
| |Unicorn Horn
| |
| |1
| |
| |1
| |
| |-
| |
| |-
| |
| |Green Salamander
| |
| |1
| |
| |1
| |
| |-
| |
| |-
| |
| |Water Orb
| |
| |3
| |
| |3
| |
| |-
| |
| |-
| |
| |Water Talisman
| |
| |3
| |
| |3
| |
| |-
| |
| |}
| |
| {| class="wikitable sortable" id="tab_alternatingtable" style="display: inline-table; margin-right:20px;"
| |
| |+[[File:08 Nature impling.png]] Nature Impling (lvl 58)
| |
| |-
| |
| ! '''Loot'''
| |
| ! '''Min'''
| |
| ! '''Max'''
| |
| |-
| |
| |-
| |
| |Limpwurt Seed
| |
| |1
| |
| |1
| |
| |-
| |
| |-
| |
| |Jangerberry Seed
| |
| |1
| |
| |1
| |
| |-
| |
| |-
| |
| |Belladonna Seed
| |
| |1
| |
| |1
| |
| |-
| |
| |-
| |
| |Harralander Seed
| |
| |1
| |
| |1
| |
| |-
| |
| |-
| |
| |Cactus Spine
| |
| |1
| |
| |1
| |
| |-
| |
| |-
| |
| |Magic Logs
| |
| |1
| |
| |1
| |
| |-
| |
| |-
| |
| |Clean Tarromin
| |
| |4
| |
| |4
| |
| |-
| |
| |-
| |
| |Coconut
| |
| |1
| |
| |1
| |
| |-
| |
| |-
| |
| |Irit Seed
| |
| |1
| |
| |1
| |
| |-
| |
| |-
| |
| |Curry Tree Seed
| |
| |1
| |
| |1
| |
| |-
| |
| |-
| |
| |Orange Tree Seed
| |
| |1
| |
| |1
| |
| |-
| |
| |-
| |
| |Clean Sanpdragon
| |
| |1
| |
| |1
| |
| |-
| |
| |-
| |
| |Kwuarm Seed
| |
| |1
| |
| |1
| |
| |-
| |
| |-
| |
| |Avantoe Seed
| |
| |5
| |
| |5
| |
| |-
| |
| |-
| |
| |Willow Seed
| |
| |1
| |
| |1
| |
| |-
| |
| |-
| |
| |Torstol Seed
| |
| |1
| |
| |1
| |
| |-
| |
| |-
| |
| |Ranarr Seed
| |
| |1
| |
| |1
| |
| |-
| |
| |-
| |
| |Clean Torstol
| |
| |2
| |
| |2
| |
| |-
| |
| |-
| |
| |Dwarf Weed Seed
| |
| |1
| |
| |1
| |
| |-
| |
| |}
| |
| {| class="wikitable sortable" id="tab_alternatingtable" style="display: inline-table; margin-right:20px;"
| |
| |+[[File:09 Magpie impling.png]] Magpie Impling (lvl 65)
| |
| |-
| |
| ! '''Loot'''
| |
| ! '''Min'''
| |
| ! '''Max'''
| |
| |-
| |
| |-
| |
| |Black Dragonhide
| |
| |6
| |
| |6
| |
| |-
| |
| |-
| |
| |Black Dragonhide*
| |
| |6
| |
| |6
| |
| |-
| |
| |-
| |
| |Diamond Amulet
| |
| |3
| |
| |3
| |
| |-
| |
| |-
| |
| |Amulet of Power
| |
| |3
| |
| |3
| |
| |-
| |
| |-
| |
| |Ring of Forging
| |
| |3
| |
| |3
| |
| |-
| |
| |-
| |
| |Splitbark Gauntlets
| |
| |1
| |
| |1
| |
| |-
| |
| |-
| |
| |Mystic Boots
| |
| |1
| |
| |1
| |
| |-
| |
| |-
| |
| |Mystic Gloves
| |
| |1
| |
| |1
| |
| |-
| |
| |-
| |
| |Rune Warhammer
| |
| |1
| |
| |1
| |
| |-
| |
| |-
| |
| |Ring of Life
| |
| |4
| |
| |4
| |
| |-
| |
| |-
| |
| |Rune sq Shield
| |
| |1
| |
| |1
| |
| |-
| |
| |-
| |
| |Dragon Dagger
| |
| |1
| |
| |1
| |
| |-
| |
| |-
| |
| |Nature Tiara
| |
| |1
| |
| |1
| |
| |-
| |
| |-
| |
| |Runite Bar
| |
| |3
| |
| |3
| |
| |-
| |
| |-
| |
| |Diamond
| |
| |5
| |
| |5
| |
| |-
| |
| |-
| |
| |Pineapple Seed
| |
| |1
| |
| |1
| |
| |-
| |
| |-
| |
| |Loop half of Key
| |
| |1
| |
| |1
| |
| |-
| |
| |-
| |
| |Tooth half of Key
| |
| |1
| |
| |1
| |
| |-
| |
| |-
| |
| |Snapdragon Seed
| |
| |1
| |
| |1
| |
| |-
| |
| |-
| |
| |Sinister Key
| |
| |1
| |
| |1
| |
| |-
| |
| |}
| |
| {| class="wikitable sortable" id="tab_alternatingtable" style="display: inline-table; margin-right:20px;"
| |
| |+[[File:10 Ninja impling.png]] Ninja Impling (lvl 74)
| |
| |-
| |
| ! '''Loot'''
| |
| ! '''Min'''
| |
| ! '''Max'''
| |
| |-
| |
| |-
| |
| |Snakeskin Boots
| |
| |1
| |
| |1
| |
| |-
| |
| |-
| |
| |Splitbark Helm
| |
| |1
| |
| |1
| |
| |-
| |
| |-
| |
| |Mystic Boots
| |
| |1
| |
| |1
| |
| |-
| |
| |-
| |
| |Rune Chainbody
| |
| |1
| |
| |1
| |
| |-
| |
| |-
| |
| |Mystic Gloves
| |
| |1
| |
| |1
| |
| |-
| |
| |-
| |
| |Opal Machete
| |
| |1
| |
| |1
| |
| |-
| |
| |-
| |
| |Rune Claws
| |
| |1
| |
| |1
| |
| |-
| |
| |-
| |
| |Rune Scimitar
| |
| |1
| |
| |1
| |
| |-
| |
| |-
| |
| |Dragon Dagger p++
| |
| |1
| |
| |1
| |
| |-
| |
| |-
| |
| |Rune Arrow
| |
| |75
| |
| |75
| |
| |-
| |
| |-
| |
| |Rune Dart
| |
| |75
| |
| |75
| |
| |-
| |
| |-
| |
| |Rune Knife
| |
| |45
| |
| |45
| |
| |-
| |
| |-
| |
| |Rune Thrownaxe
| |
| |50
| |
| |50
| |
| |-
| |
| |-
| |
| |Onyx Bolts
| |
| |2
| |
| |2
| |
| |-
| |
| |-
| |
| |Onyx Bolt Tips
| |
| |4
| |
| |4
| |
| |-
| |
| |-
| |
| |Black Dragonhide
| |
| |10
| |
| |10
| |
| |-
| |
| |-
| |
| |Prayer Potion (3)
| |
| |5
| |
| |5
| |
| |-
| |
| |-
| |
| |Weapon Poison (+)
| |
| |5
| |
| |5
| |
| |-
| |
| |-
| |
| |Dagannoth Hide
| |
| |1
| |
| |1
| |
| |-
| |
| |}
| |
| </center>
| |
| | |
| |-|
| |
| High Level (80-99)=
| |
| <center>
| |
| {| class="wikitable sortable" id="tab_alternatingtable" style="display: inline-table; margin-right:20px;"
| |
| |+[[File:11 Crystal impling.png]] Crystal Impling (lvl 80)
| |
| |-
| |
| ! '''Loot'''
| |
| ! '''Min'''
| |
| ! '''Max'''
| |
| |-
| |
| |-
| |
| |Amulet of Power
| |
| |5
| |
| |7
| |
| |-
| |
| |-
| |
| |Dragonstone Amulet
| |
| |1
| |
| |1
| |
| |-
| |
| |-
| |
| |Dragonstone
| |
| |2
| |
| |2
| |
| |-
| |
| |-
| |
| |Ruby Bolt Tips
| |
| |50
| |
| |150
| |
| |-
| |
| |-
| |
| |Onyx Bolt Tips
| |
| |10
| |
| |10
| |
| |-
| |
| |-
| |
| |Rune Arrowtips
| |
| |200
| |
| |300
| |
| |-
| |
| |-
| |
| |Rune Arrow
| |
| |500
| |
| |1000
| |
| |-
| |
| |-
| |
| |Rune Javelin Heads
| |
| |20
| |
| |60
| |
| |-
| |
| |-
| |
| |Rune Dart Tips
| |
| |30
| |
| |80
| |
| |-
| |
| |-
| |
| |Rune Dart
| |
| |75
| |
| |150
| |
| |-
| |
| |-
| |
| |Dragon Dart Tips
| |
| |15
| |
| |20
| |
| |-
| |
| |-
| |
| |Dragon Dagger
| |
| |2
| |
| |2
| |
| |-
| |
| |-
| |
| |Rune Scimitar
| |
| |3
| |
| |6
| |
| |-
| |
| |-
| |
| |Babydragon Bones
| |
| |75
| |
| |125
| |
| |-
| |
| |-
| |
| |Ranarr Seeds
| |
| |5
| |
| |10
| |
| |-
| |
| |-
| |
| |Yew Seed
| |
| |1
| |
| |1
| |
| |-
| |
| |}
| |
| {| class="wikitable sortable" id="tab_alternatingtable" style="display: inline-table; margin-right:20px;"
| |
| |+[[File:12 Dragon impling.png]] Dragon Impling (lvl 83)
| |
| |-
| |
| ! '''Loot'''
| |
| ! '''Min'''
| |
| ! '''Max'''
| |
| |-
| |
| |-
| |
| |Dragonstone Bolt Tips
| |
| |10
| |
| |30
| |
| |-
| |
| |-
| |
| |Dragonstone Bolt Tips
| |
| |36
| |
| |36
| |
| |-
| |
| |-
| |
| |Mystic Robe Bottom
| |
| |1
| |
| |1
| |
| |-
| |
| |-
| |
| |Amulet of Glory
| |
| |3
| |
| |3
| |
| |-
| |
| |-
| |
| |Dragonstone Amulet
| |
| |2
| |
| |2
| |
| |-
| |
| |-
| |
| |Dragon Arrow
| |
| |150
| |
| |300
| |
| |-
| |
| |-
| |
| |Dragonstone Bolts
| |
| |15
| |
| |45
| |
| |-
| |
| |-
| |
| |Dragon Longsword
| |
| |1
| |
| |1
| |
| |-
| |
| |-
| |
| |Dragon Dagger (p++)
| |
| |3
| |
| |3
| |
| |-
| |
| |-
| |
| |Dragon Dart
| |
| |150
| |
| |300
| |
| |-
| |
| |-
| |
| |Dragonstone
| |
| |3
| |
| |3
| |
| |-
| |
| |-
| |
| |Dragon Dart Tip
| |
| |150
| |
| |400
| |
| |-
| |
| |-
| |
| |Dragon Arrowtips
| |
| |150
| |
| |400
| |
| |-
| |
| |-
| |
| |Dragon Javelin Heads
| |
| |25
| |
| |40
| |
| |-
| |
| |-
| |
| |Babydragon Bones
| |
| |150
| |
| |300
| |
| |-
| |
| |-
| |
| |Dragon Bones
| |
| |75
| |
| |125
| |
| |-
| |
| |-
| |
| |Magic Seed
| |
| |1
| |
| |1
| |
| |-
| |
| |-
| |
| |Snapdragon Seed
| |
| |6
| |
| |6
| |
| |-
| |
| |-
| |
| |Summer Pie
| |
| |15
| |
| |15
| |
| |-
| |
| |}
| |
| {| class="wikitable sortable" id="tab_alternatingtable" style="display: inline-table; margin-right:20px;"
| |
| |+[[File:13 Kingly impling.png]] Kingly Impling (lvl 91)
| |
| |-
| |
| ! '''Loot'''
| |
| ! '''Min'''
| |
| ! '''Max'''
| |
| |-
| |
| |-
| |
| |Uncut Diamond
| |
| |15
| |
| |40
| |
| |-
| |
| |-
| |
| |Amulet of Glory
| |
| |3
| |
| |11
| |
| |-
| |
| |-
| |
| |Dragonstone Amulet
| |
| |3
| |
| |3
| |
| |-
| |
| |-
| |
| |Crystal Key
| |
| |2
| |
| |5
| |
| |-
| |
| |-
| |
| |Royal Amulet
| |
| |1
| |
| |1
| |
| |-
| |
| |-
| |
| |Royal Crown
| |
| |1
| |
| |1
| |
| |-
| |
| |-
| |
| |Royal Leggings
| |
| |1
| |
| |1
| |
| |-
| |
| |-
| |
| |Royal Sceptre
| |
| |1
| |
| |1
| |
| |-
| |
| |-
| |
| |Royal Shirt
| |
| |1
| |
| |1
| |
| |-
| |
| |-
| |
| |Dragon Arrow
| |
| |200
| |
| |400
| |
| |-
| |
| |-
| |
| |Dragon Arrowtips
| |
| |200
| |
| |500
| |
| |-
| |
| |-
| |
| |Dragon Bolt Tips
| |
| |55
| |
| |70
| |
| |-
| |
| |-
| |
| |Dragon Dart
| |
| |200
| |
| |400
| |
| |-
| |
| |-
| |
| |Dragon Dart Tip
| |
| |200
| |
| |500
| |
| |-
| |
| |-
| |
| |Dragon Longsword
| |
| |2
| |
| |2
| |
| |-
| |
| |-
| |
| |Dragon Spear
| |
| |1
| |
| |1
| |
| |-
| |
| |-
| |
| |Uncut Dragonstone
| |
| |5
| |
| |5
| |
| |-
| |
| |-
| |
| |Dragonstone
| |
| |6
| |
| |6
| |
| |-
| |
| |-
| |
| |Dragon Bolts
| |
| |40
| |
| |70
| |
| |-
| |
| |-
| |
| |Onyx Bolts
| |
| |45
| |
| |70
| |
| |-
| |
| |-
| |
| |Runite Ore
| |
| |10
| |
| |10
| |
| |-
| |
| |-
| |
| |Onyx Bolt Tips
| |
| |1
| |
| |75
| |
| |-
| |
| |-
| |
| |Dragon 2h Sword
| |
| |1
| |
| |1
| |
| |-
| |
| |-
| |
| |Shield Left Half
| |
| |1
| |
| |1
| |
| |-
| |
| |-
| |
| |Uncut Onyx
| |
| |1
| |
| |1
| |
| |-
| |
| |}
| |
| </center>
| |
| </tabber>
| |
 Hunter is a skill in which players catch different animals and creatures in Zeah. Although Hunter is a non-combat skill, players can still be damaged while hunting. Using hunting equipment bought from hunter stores, players can hunt specific creatures obtaining rewards such as spotted kebbit fur for spotted cape, chinchompas, and the fabled Dragon and Kingly implings.
We highly advise getting  Silver Huntsman relic before beginning to train Hunter, as it increases the number of traps you can place by one and your traps no longer collapse if a catch is failed.
General information and tips
Levelling up Hunter allows players to lay more traps at once. Training Hunter within the Wilderness allows players to deploy an extra trap.
 Level Level
|
Concurrent traps
|
Wilderness
|
| 1
|
1
|
2
|
| 20
|
2
|
3
|
| 40
|
3
|
4
|
| 60
|
4
|
5
|
| 80
|
5
|
6
|
Required items
 Bird snares if opting to catch birds for levels 1-43.
 Box trap for chinchompas and grenwalls, starting at level 63.
Suggested items
 Bird houses allow for passive Hunter training. These are not necessary in progressing the skill, but definitely recommended. More on this can be found HERE.
Birdhouses
 Birdhouses are a way to passively train Hunter. All you have to do is place the Birdhouse, put a few seeds inside, then wait 30 minutes for the Birds to trap. From level 5 onwards you should consistently be doing Birdhouses. See the Bird House Trapping article for more information.
Training Hunter
Levels 1 - 43: Crimson Swifts
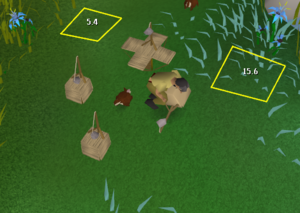
 Crimson Swifts are located east of the Feldip Hunter Area by the shore. Utilize the Teleport Nexus, search 'Feldip Hunter Area', and run far east to the shore. You need a Bird snare to catch them.

Player placing bird snares to hunt Crimson Swifts
Levels 43 – 63: Falconry
 Catching spotted kebbits (and
  dark kebbits at level 57) using the Falconry technique offers the fastest experience from level 43 to 63. They are located in the Piscatoris Falconry area. While this provides higher experience rates than catching lizards, it is also more click-intensive. For more information on how Falconry works click HERE.

Player Hunting Spotted Kebbits through Falconry
Levels 63 - 77: Red chinchompas
 Hunting carnivorous chinchompas offers relatively fast Hunter experience for players who do not wish to hunt
  black chinchompas in the Wilderness from 73 to 77. The Gwenith Hunter area is the best location to hunt red chinchompas. Utilize the Teleport Nexus, search 'Gwenith Hunter Area', and run a few tiles east.
Player Hunting Red Chinchompas in the Gwenith Hunter Area
Levels 77 - 99: Grenwalls
Catching  Grenwalls requiring a Hunter level of 77 to catch and offer the fastest experience. You will need box traps in order to catch them. The best location to hunt these at is the Platinum+ Donator Zone. However, for those without the donator rank utilize the Teleport Nexus, search "Isafdar Hunter Area", and begin trapping.
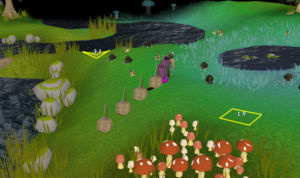
Player Hunting Grenwalls at the Isafdar Hunter Area
Implings
 Implings can be caught inside puro-puro. They are mostly known not as an effective training method, but for the variety of loot they reward upon catch. See the implings article for more details regarding rewards.


