Difference between revisions of "Giant mole"
Jump to navigation
Jump to search
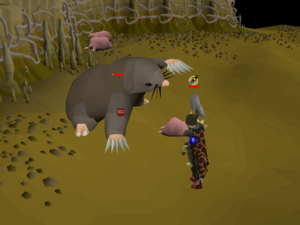
A player fights the Giant Mole with the Dharok's method
| (32 intermediate revisions by 2 users not shown) | |||
| Line 1: | Line 1: | ||
The '''Giant Mole''' is a fairly simple low-level boss that can be found under Falador. It is killed for its mole claw, mole skin and Baby mole drops. | |||
[[File:Fighting the Giant Mole2.png|frame|right|<center>A player fights the Giant Mole with the Dharok's method</center>]] | |||
| | __TOC__ | ||
| | ==How to get there== | ||
# Use the [[Portal Nexus]], north of Home | |||
# Select PvM category | |||
# Choose Giant Mole (2nd page) | |||
* (or search for "Giant Mole") | |||
You will teleport to the Falador Garden, where you dig in one of the holes to enter Giant Mole's cavern | |||
When | ==Attacks and abilities== | ||
[[File: | * Melee attack: The mole swipes a claw at its target, dealing up to 21 damage. | ||
* Burrow: When the mole's health is between 5-50%, there is a 25% chance for any incoming attack to cause it to burrow away into another location. There is also a chance that the dirt she digs while burrowing to escape can extinguish the player's light source (shown with dirt splatters on the player's screen), though covered light sources will be unaffected by this. | |||
[[File:Falador Mole Lair map.png|thumb|right|<center>A map of the Falador Mole Lair, labelling spawn location and burrow locations of the Giant Mole.</center>]] | |||
==Guide== | |||
Killing the mole is easy, as it doesn't have any unique abilities that can endanger the player. | |||
* For '''low levelled players''', they can safespot it with the cavern walls, as it does not move around the safespot to attack players. Ranging is highly recommended when safespotting, as it has low ranged defence. Players meleeing it should activate Protect from Melee and use stabbing weapons, as it has lower stab defence compared to slash and crush. | |||
* For '''high levelled players''', the mole can be killed quickly with Dharok the Wretched's equipment, as it is easily possible to kill her within 2-3 hits depending on the player's strength boosting equipment. Simply lower your health to 1 with the Locator orb or Dwarven rock cake, activate Protect from Melee and flick Piety. | |||
When the mole | <small>'''Note:''' When the mole reaches half health and lower, there is a chance that it will dig away to another location in the lair. The mole also loses aggression towards the primary target when burrowing away.</small> | ||
== | == Suggested Skills == | ||
{{ | *{{SCP|Attack|70+}} | ||
{{ | *{{SCP|Strength|70+}} | ||
| | *{{SCP|Defence|40+}} (70+ Recommended) | ||
| | *{{SCP|Ranged|75+}} | ||
| | *{{SCP|Prayer}} 43+ (95 is good for [[File:Turmoil.png]] Turmoil) | ||
| | |||
}} | |||
{{ | |||
== | ==Equipment== | ||
{{ | <tabber> | ||
Ranged Method= | |||
Currently, the Twisted bow is the most effective way to kill the Giant Mole. It offers the highest damage of any other setup. A dwarf multicannon can also be brought to speed up kills. | |||
{| class="wikitable sticky-header" style=text-align:center; | |||
! <center>Slot</center> !! colspan="5"|<center>Item (most effective → least effective) </center> | |||
|- | |||
|[[File:Head slot.png|center]] || [[File:Void ranger helm.png]] Void ranger helm<sup>1</sup> or [[File:Slayer helmet (i).png]] Slayer helm (i)<sup>2</sup> || [[File:Armadyl helmet.png]] Armadyl helmet || [[File:Royal dragonhide coif.png]] Royal d'hide coif || [[File:Robin hood hat.png]] Robin hood hat || [[File:Blessed coif.gif]] Blessed coif | |||
|- | |||
|[[File:Neck slot.png|center]] || [[File:Necklace of anguish.png]] Necklace of anguish || [[File:Saradomin's murmur.png]] Saradomin's murmur || [[File:Amulet of fury.png]] Amulet of fury || [[File:Amulet of glory.png]] Amulet of glory || {{NA}} | |||
|- | |||
|[[File:Cape slot.png|center]] || [[File:Ava's assembler.png]] Ava's assembler || [[File:Ava's accumulator.png]] Ava's accumulator || [[File:Ranging cape.png]] Ranging cape || [[File:Ava's attractor.png]] Ava's attractor || {{NA}} | |||
|- | |||
|[[File:Body slot.png|center]] || [[File:Elite void top.png]] Elite void top<sup>1</sup> || [[File:Armadyl chestplate.png]] Armadyl chestplate || [[File:Royal dragonhide body.png]] Royal d'hide body || [[File:Karil's leathertop.png]] Karil's leathertop || [[File:Black d'hide body.png]] Black d'hide body | |||
|- | |||
|[[File:Legs slot.png|center]] || [[File:Elite void robe.png]] Elite void robe<sup>1</sup> || [[File:Armadyl chainskirt.png]] Armadyl chainskirt || [[File:Royal dragonhide chaps.png]] Royal d'hide chaps|| [[File:Karil's leatherskirt.png]] Karil's leatherskirt || [[File:Black d'hide chaps.png]] Black d'hide chaps | |||
|- | |||
|[[File:Weapon slot.png|center]] || [[File:Twisted bow.png]] Twisted bow || [[File:Toxic blowpipe.png]] Toxic blowpipe || [[File:Zaryte crossbow.png]] Zaryte crossbow|| [[File:Chaotic crossbow.png]] Chaotic crossbow || [[File:Dragon crossbow.png]] Dragon crossbow or [[File:Rune crossbow.png]] Rune Crossbow | |||
|- | |||
|[[File:Shield slot.png|center]] || [[File:Eagle-eye_kiteshield.png]] Eagle-eye kiteshield || [[File:Dragonfire ward.png]] Dragonfire ward || [[File:Twisted buckler.png]] Twisted buckler || [[File:Crystal shield.png]] Crystal shield || [[File:Anti-dragon shield.png]] Anti-dragon shield | |||
|- | |||
|[[File:Ammo slot.png|center]] || [[File:Dragon arrow 5.png]] Dragon arrows || [[File:Amethyst_arrow.png]] Amethyst arrows || [[File:Ruby dragon bolts (e) 5.png]] Ruby dragon bolts (e) + [[File:Diamond dragon bolts (e) 5.png]] Diamond dragon bolts (e) || [[File:Ruby bolts (e) 5.png]] Ruby bolts (e) + [[File:Diamond_bolts_5.png ]] Diamond bolts (e) || {{NA}} | |||
|- | |||
|[[File:Hands slot.png|center]] || [[File:Void knight gloves.png]] Void gloves<sup>1</sup> || [[File:Swift gloves (black).png]] Swift gloves || [[File:Zaryte vambraces.png]] Zaryte vambraces || [[File:Barrows gloves.png]] Barrows gloves || [[File:Black d'hide vambraces.png]] Black d'hide vambraces | |||
|- | |||
|[[File:Feet slot.png|center]] || [[File:Pegasian boots.png]] Pegasian boots || [[File:Glaiven boots.png]] Glavien boots || [[File:Ranger boots.png]] Ranger boots || [[File:Blessed boots.gif]] Blessed boots || [[File:Boots of brimstone.png]] Boots of brimstone | |||
|- | |||
|[[File:Ring slot.png|center]] || [[File:Archers ring (i).png]] Archers ring (i) || [[File:Ring of suffering (i).png]] Ring of Suffering (i) || [[File:Archers ring.png]] Archers ring || [[File:Ring of wealth (i).png]] Ring of wealth (i) || [[File:Ring of wealth (i).png]] Ring of wealth | |||
|- | |||
|} | |||
# Only if you are wearing the full set | |||
# If you have a Reaper Task | |||
== Inventory == | |||
* Special attack weapon (optional) | |||
* 3-5 Overloads or Extreme Ranging potions | |||
* 11-17 Super restores or Prayer potions | |||
* Dwarf multicannon and cannonballs to speed up kills (optional) | |||
* Steel titan pouch and scrolls to speed up kills (optional) | |||
{ | |-| | ||
Melee Method (Dharok's)= | |||
Use the locator orb or a dwarven rock cake to get down to 1 Hitpoint. Always keep Protect from Melee on when you're attacking the boss. If the player does not own a cape that provides a Strength bonus, they can instead use a cape that provides a prayer bonus to maximise the amount of time Protect from Melee is active before needing to restore Prayer Points. | |||
{| class="wikitable sticky-header" style=text-align:center; | |||
! <center>Slot</center> !! colspan="5"|<center>Item (most effective → least effective) </center> | |||
|- | |||
|[[File:Head slot.png|center]] || [[File:Dharok's helm.png]] Slayer helm (i) || {{NA}} || {{NA}} || {{NA}} || {{NA}} | |||
|- | |||
|[[File:Neck slot.png|center]] || [[File:Salve amulet(ei).png]] Salve amulet (e) or (ei) || [[File:Amulet of torture.png]] Amulet of torture || [[File:Amulet of fury.png]] Amulet of fury || [[File:Amulet of glory.png]] Amulet of glory || [[File:Amulet of power.png]] Amulet of power | |||
{{ | |- | ||
|[[File:Cape slot.png|center]] || [[File:Infernal cape.png]] Infernal cape || [[File:Fire cape.png]] Fire cape || [[File:Max cape.png]] Max cape || [[File:Capes of accomplishments (trimmed).gif]] Cape of accomplishment || [[File:Mythical cape.png]] Mythical cape | |||
{{ | |- | ||
|[[File:Body slot.png|center]] || [[File:Dharok's platebody.png]] Dharok's platebody || {{NA}} || {{NA}} || {{NA}} || {{NA}} | |||
{{ | |- | ||
|[[File:Legs slot.png|center]] || [[File:Dharok's platelegs.png]] Dharok's platelegs || {{NA}} || {{NA}} || {{NA}} || {{NA}} | |||
{{ | |||
{{ | |||
{{ | |||
{{ | |||
{{ | |||
{{ | |||
{{ | |||
{{ | |||
|- | |- | ||
| [[ | |[[File:Weapon slot.png|center]] || [[File:Dharok's greataxe.png]] Dharok's greataxe || {{NA}} || {{NA}} || {{NA}} || {{NA}} | ||
| | |||
| | |||
| | |||
|- | |- | ||
| [[ | |[[File:Hands slot.png|center]] || [[File:Ferocious gloves.png]] Ferocious gloves || [[File:Goliath gloves (black).png]] Goliath gloves || [[File:Barrows gloves.png]] Barrows gloves || [[File:Dragon gloves.png]] Dragon gloves || [[File: Rune gloves.png]] Rune gloves | ||
| | |||
| | |||
| | |||
|- | |- | ||
| [[ | |[[File:Feet slot.png|center]] || [[File:Primordial boots.png]] Primordial boots || [[File:Steadfast boots.png]] Steadfast boots || [[File:Dragon boots.png]] Dragon boots || [[File:Guardian boots.png]] Guardian boots || [[File:Bandos boots.png]] Bandos boots | ||
| | |||
| | |||
| | |||
|- | |- | ||
| [[ | |[[File:Ring slot.png|center]] || [[File:Berserker ring (i).png]] Berserker ring (i) || [[File:Ring of suffering (i).png]] Ring of Suffering (i) || [[File:Berserker ring.png]] Berserker ring || [[File:Ring of wealth (i).png]] Ring of wealth (i) || [[File:Ring of wealth (i).png]] Ring of wealth | ||
| | |||
| | |||
| | |||
|- | |- | ||
| [[ | |<center>[[File:Special attack orb.png]]</center> || [[File:Crystal halberd.png]] Crystal halberd || [[File:Dragon claws.png]] Dragon claws || [[File:Dragon dagger.png]] Dragon dagger || [[File:Vesta's longsword.png]] Vesta's longsword || [[File:Armadyl godsword.png]] Any Godsword | ||
| | |||
| | |||
| | |||
|- | |- | ||
|} | |} | ||
== Inventory == | |||
== | * Special attack weapon (optional) | ||
* | * Dwarven rock cake | ||
* 3-5 Overloads | |||
* 11-17 Super restores or Prayer potions | |||
* Dwarf multicannon and cannonballs to speed up kills (optional) | |||
* Steel titan pouch and scrolls to speed up kills (optional) | |||
</tabber> | |||
</div> | |||
Latest revision as of 03:18, 26 November 2022
The Giant Mole is a fairly simple low-level boss that can be found under Falador. It is killed for its mole claw, mole skin and Baby mole drops.

How to get there
- Use the Portal Nexus, north of Home
- Select PvM category
- Choose Giant Mole (2nd page)
- (or search for "Giant Mole")
You will teleport to the Falador Garden, where you dig in one of the holes to enter Giant Mole's cavern
Attacks and abilities
- Melee attack: The mole swipes a claw at its target, dealing up to 21 damage.
- Burrow: When the mole's health is between 5-50%, there is a 25% chance for any incoming attack to cause it to burrow away into another location. There is also a chance that the dirt she digs while burrowing to escape can extinguish the player's light source (shown with dirt splatters on the player's screen), though covered light sources will be unaffected by this.

Guide
Killing the mole is easy, as it doesn't have any unique abilities that can endanger the player.
- For low levelled players, they can safespot it with the cavern walls, as it does not move around the safespot to attack players. Ranging is highly recommended when safespotting, as it has low ranged defence. Players meleeing it should activate Protect from Melee and use stabbing weapons, as it has lower stab defence compared to slash and crush.
- For high levelled players, the mole can be killed quickly with Dharok the Wretched's equipment, as it is easily possible to kill her within 2-3 hits depending on the player's strength boosting equipment. Simply lower your health to 1 with the Locator orb or Dwarven rock cake, activate Protect from Melee and flick Piety.
Note: When the mole reaches half health and lower, there is a chance that it will dig away to another location in the lair. The mole also loses aggression towards the primary target when burrowing away.
Suggested Skills
 70+
70+  70+
70+  40+ (70+ Recommended)
 75+
75+  43+ (95 is good for
  Turmoil)
Equipment
Currently, the Twisted bow is the most effective way to kill the Giant Mole. It offers the highest damage of any other setup. A dwarf multicannon can also be brought to speed up kills.
| N/A | |||||
| N/A | |||||
| N/A | |||||
- Only if you are wearing the full set
- If you have a Reaper Task
Inventory
- Special attack weapon (optional)
- 3-5 Overloads or Extreme Ranging potions
- 11-17 Super restores or Prayer potions
- Dwarf multicannon and cannonballs to speed up kills (optional)
- Steel titan pouch and scrolls to speed up kills (optional)