Difference between revisions of "Queen Black Dragon"
| (One intermediate revision by one other user not shown) | |||
| Line 42: | Line 42: | ||
{| class="wikitable sticky-header" | {| class="wikitable sticky-header" style=text-align:center; | ||
! <center>Slot</center> !! colspan="5"|<center>Item (most effective → least effective) </center> | ! <center>Slot</center> !! colspan="5"|<center>Item (most effective → least effective) </center> | ||
|- | |- | ||
|[[File:Head slot.png|center]] || [[File:Slayer helmet (i).png]] Slayer helm (i)<sup>1</sup> || [[File:Torva full helm.png]] Torva full helm || [[File:Neitiznot faceguard.png]] Neitiznot faceguard || [[File:Statius's full helm.png]] Statius's full helm || [[File:Serpentine helm.png]] Serpentine helm or [[File:Helm of neitiznot.png]] Helm of Neitiznot | |[[File:Head slot.png|center]] || [[File:Slayer helmet (i).png]] Slayer helm (i)<sup>1</sup> || [[File:Torva full helm.png]] Torva full helm || [[File:Neitiznot faceguard.png]] Neitiznot faceguard || [[File:Statius's full helm.png]] Statius's full helm || [[File:Serpentine helm.png]] Serpentine helm or [[File:Helm of neitiznot.png]] Helm of Neitiznot | ||
|- | |- | ||
|[[File:Neck slot.png|center]] || [[File:Amulet of torture.png]] Amulet of torture || [[File:Amulet of fury.png]] Amulet of fury || [[File:Amulet of glory.png]] Amulet of glory || [[File:Amulet of power.png]] Amulet of power | |[[File:Neck slot.png|center]] || [[File:Amulet of torture.png]] Amulet of torture || [[File:Amulet of fury.png]] Amulet of fury || [[File:Amulet of glory.png]] Amulet of glory || [[File:Amulet of power.png]] Amulet of power || {{NA}} | ||
|- | |- | ||
|[[File:Cape slot.png|center]] || [[File:Infernal cape.png]] Infernal cape || [[File:Fire cape.png]] Fire cape || [[File:Max cape.png]] Max cape || [[File:Capes of accomplishments (trimmed).gif]] Cape of accomplishment || [[File:Mythical cape.png]] Mythical cape | |[[File:Cape slot.png|center]] || [[File:Infernal cape.png]] Infernal cape || [[File:Fire cape.png]] Fire cape || [[File:Max cape.png]] Max cape || [[File:Capes of accomplishments (trimmed).gif]] Cape of accomplishment || [[File:Mythical cape.png]] Mythical cape | ||
|- | |- | ||
|[[File:Body slot.png|center]] || [[File: Inquisitor's hauberk.png]] Inquisitor's hauberk / [[File:Torva platebody.png]] Torva platebody || [[File:Statius's platebody.png]] Statius's platebody || [[File:Bandos chestplate.png]] Bandos chestplate || [[File:Dharok's platebody.png]] Dharok's platebody (or Barrows platebodies) || [[File:Rune platebody.png]] Rune platebody | |[[File:Body slot.png|center]] || [[File: Inquisitor's hauberk.png]] Inquisitor's hauberk / [[File:Torva platebody.png]] Torva platebody || [[File:Statius's platebody.png]] Statius's platebody || [[File:Bandos chestplate.png]] Bandos chestplate || [[File:Dharok's platebody.png]] Dharok's platebody (or Barrows platebodies) || [[File:Rune platebody.png]] Rune platebody | ||
| Line 79: | Line 79: | ||
<br> | <br> | ||
[[file:Super restore flask (6).png]] 4-8 Super restore flasks | [[file:Super restore flask (6).png]] 4-8 Super restore flasks | ||
==Overview== | ==Overview== | ||
| Line 150: | Line 149: | ||
|-| | |-| | ||
Time stop= | Time stop= | ||
[[File:QBD_Time_Stop. | [[File:QBD_Time_Stop.webp|thumb|280px|A player is affected by the time stop]] | ||
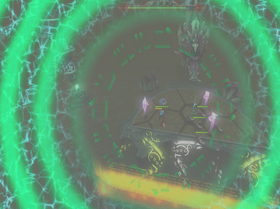
During phase 4, the Queen Black Dragon may also forcibly teleport any tortured soul to the edges of the actual platform, shouting "Kill me mortal...quickly! HURRY! BEFORE THE SPELL IS COMPLETE!" The soul will shout: "Time is short!" "She is pouring her energy into me...hurry!" and "The spell is nearly complete!" | During phase 4, the Queen Black Dragon may also forcibly teleport any tortured soul to the edges of the actual platform, shouting "Kill me mortal...quickly! HURRY! BEFORE THE SPELL IS COMPLETE!" The soul will shout: "Time is short!" "She is pouring her energy into me...hurry!" and "The spell is nearly complete!" | ||
Latest revision as of 03:39, 26 November 2022
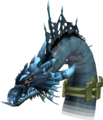
![]() The Queen Black Dragon (or QBD) is a very powerful dragon slumbering at the bottom of the Grotworm Lair.
The Queen Black Dragon (or QBD) is a very powerful dragon slumbering at the bottom of the Grotworm Lair.
Requirements
Suggested Skills
 80 or higher
 85 or higher
 75 or higher
 99 for Steel Titan Pouches
 43+ (92/95 Highly recommended for
  Soul Split &
  Turmoil)
Auras & Relics
Gear and Inventory setup
- If you have a Black dragon slayer task
![]() 50+ Steel titan scrolls
50+ Steel titan scrolls
![]() 1-2 Overload flasks
1-2 Overload flasks
![]() 1-2 Prayer renewal flasks
1-2 Prayer renewal flasks
![]() 12-16 Saradomin brew flasks
12-16 Saradomin brew flasks
![]() 4-8 Super restore flasks
4-8 Super restore flasks
Overview
The fighting area consists of a platform 19 squares from west to east. The Queen Black Dragon's head can be attacked at the north of the arena.
The Queen Black Dragon fight takes place over four phases. She has 25,000 health in each phase; giving a total of 100,000 health. You will need to activate artefacts within the arena to progress. At start of the second, third, and fourth phases a magical platform is added to the arena, allowing the player to reach to the next appropriate artefact. Standing on one of these platforms for too long at once deals 1500 typeless damage every few seconds until the player returns to the original platform
Until the correct artefact has been activated, the Queen Black Dragon will continually spit out aggressive level 72 giant worms into the arena. Up to 11 worms may be present at any given time; if the player still has not activated the artefact after the maximum number of worms has been spawned, they receive the message "The power of the unprotected artefact leaks out and damages you!" the player begins receiving constant hard typeless hits of 2000 from the artefact until it is activated.
The Queen Black Dragon possesses two auto-attacks; a simple melee and ranged attack. The melee attack is only used when the player is within 5 spaces of her (two tiles north from the platform artefact); she simply lunges at the player to bite them. The ranged attack is used when the player is out of her melee attack range, in which she simply sweeps her head across the arena. This attack is generally stronger than her melee attack.
In addition to her auto-attacks the Queen Black Dragon will attack using standard dragonfire (with a ten second cooldown on her using this attack). This attack will hit over 1500 without any dragonfire protection; however it is reduced to the low 400s with full antifire protection.
Attacks
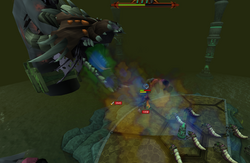
From phase one onwards the Queen Black Dragon can use a fire wall attack. When she is about to use the attack a message saying "The Queen Black Dragon takes a huge breath." appears in the chatbox. A few seconds later, a fire wall will appear at the northern edge of the fighting area, moving south towards you.
There is always a gap in the wall: move to stand in the gap to avoid being damaged. There are three possible walls:
- Possibility 1 has the gap on the 5th square.
- Possibility 2 has the gap on the 9th square (one square to the left of the centre artefact).
- Possibility 3 has the gap on the 15th square (the 5th from the right).
If you do not move in time you will be dealt damage for every game tick of contact that you have with the flame wall. This works out to two hits per wall. 7 damage is dealt per hit if you are using super antifires, 18 damage is dealt while using regular antifires, or 25 damage without any dragonfire protection.
In phases 2 and 3, an additional fire wave is launched right after the previous wave, for a total of 2 and 3 consecutive fire walls on these phases. These additional fire walls will have gaps in different places; the Queen Black Dragon will not repeat a fire wall with the same gap until the other two options have been exhausted.
It is possible to avoid the flame walls without running through the gaps. To do so, the player must stand still until the flame wall is one square north of them, and then click to run straight through the fire. If done properly, the player will take no damage. Be aware that lag can cause desyncs and result in the player getting hit once.


