|
|
| Line 41: |
Line 41: |
| ==Equipment== | | ==Equipment== |
| ===Setups=== | | ===Setups=== |
| ==Equipment==
| |
| <tabber>
| |
| Ranged=
| |
|
| |
| {| class="wikitable sticky-header" style=width:1850px;style=text-align:center;
| |
| ! <center>Slot</center> !! colspan="5"|<center>Item (most effective → least effective) </center>
| |
| |-
| |
| |[[File:Head slot.png|center]] || Pernix Cowl || [[File:Armadyl helmet.png]] Armadyl helmet || [[File:Royal dragonhide coif.png]] Royal coif || [[File:Serpentine helm.png]] Serpentine helm || [[File:Robin hood hat.png]] Robin hood hat or [[File:Blessed coif.gif]] Blessed coif
| |
| |-
| |
| |[[File:Neck slot.png|center]] || [[File:Necklace of anguish.png]] Necklace of anguish || [[File:Saradomin's murmur.png]] Saradomin's murmur || [[File:Amulet of fury.png]] Amulet of fury || [[File:Amulet of glory.png]] Amulet of glory
| |
| |-
| |
| |[[File:Cape slot.png|center]] || [[File:Ava's assembler.png]] Ava's assembler || [[File:Ava's accumulator.png]] Ava's accumulator || [[File:Ranging cape.png]] Ranging cape || [[File:Ava's attractor.png]] Ava's attractor || {{NA}}
| |
| |-
| |
| |[[File:Body slot.png|center]] || [[File:Armadyl chestplate.png]] Armadyl chestplate || [[File:Karil's leathertop.png]] Karil's leathertop || [[File:Royal dragonhide body.png]] Royal d'hide body || [[File:Blessed body.gif]] Blessed body || [[File:Black d'hide body.png]] Black d'hide body
| |
| |-
| |
| |[[File:Legs slot.png|center]] || [[File:Armadyl chainskirt.png]] Armadyl chainskirt || [[File:Karil's leatherskirt.png]] Karil's leatherskirt || [[File:Royal dragonhide chaps.png]] Royal d'hide chaps || [[File:Blessed chaps.gif]] Blessed chaps || [[File:Black d'hide chaps.png]] Black d'hide chaps
| |
| |-
| |
| |[[File:Weapon slot.png|center]] || [[File:Toxic blowpipe.png]] Toxic blowpipe || [[File:Zaryte crossbow.png]] Zaryte crossbow|| [[File:Chaotic crossbow.png]] Chaotic crossbow || [[File:Dragon crossbow.png]] Dragon crossbow or [[File:Rune crossbow.png]] Rune Crossbow
| |
| |-
| |
| |[[File:Shield slot.png|center]] || [[File:Eagle-eye_kiteshield.png]] Eagle-eye kiteshield || [[File:Dragonfire ward.png]] Dragonfire ward || [[File:Twisted buckler.png]] Twisted buckler || [[File:Crystal shield.png]] Crystal shield || [[File:Holy book.png]] God book
| |
| |-
| |
| |[[File:Ammo slot.png|center]] || | [[File:Ruby dragon bolts (e) 5.png]] Ruby dragon bolts (e) + [[File:Diamond dragon bolts (e) 5.png]] Diamond dragon bolts (e) || [[File:Ruby bolts (e) 5.png]] Ruby bolts (e) + [[File:Diamond_bolts_5.png ]] Diamond bolts (e) || {{NA}} || {{NA}} || {{NA}}
| |
| |-
| |
| |[[File:Hands slot.png|center]] || [[File:Swift gloves (black).png]] Swift gloves || [[File:Zaryte vambraces.png]] Zaryte vambraces || [[File:Barrows gloves.png]] Barrows gloves || [[File:Black d'hide vambraces.png]] Black d'hide vambraces
| |
| |-
| |
| |[[File:Feet slot.png|center]] || [[File:Pegasian boots.png]] Pegasian boots || [[File:Glaiven boots.png]] Glavien boots || [[File:Ranger boots.png]] Ranger boots || [[File:Blessed boots.gif]] Blessed boots || [[File:Boots of brimstone.png]] Boots of brimstone
| |
| |-
| |
| |[[File:Ring slot.png|center]] || [[File:Archers ring (i).png]] Archers ring (i) || [[File:Ring of suffering (i).png]] Ring of Suffering (i) || [[File:Archers ring.png]] Archers ring || [[File:Ring of wealth (i).png]] Ring of wealth (i) || [[File:Ring of wealth (i).png]] Ring of wealth
| |
| |-
| |
|
| |
| |-|
| |
| Melee=
| |
|
| |
| {| class="wikitable sticky-header" style=width:1850px;style=text-align:center;
| |
| ! <center>Slot</center> !! colspan="5"|<center>Item (most effective → least effective) </center>
| |
| |-
| |
| |[[File:Head slot.png|center]] || [[File:Slayer helmet (i).png]] Slayer helm (i)<sup>1</sup> || [[File:Torva full helm.png]] Torva full helm || [[File:Neitiznot faceguard.png]] Neitiznot faceguard || [[File:Statius's full helm.png]] Statius's full helm || [[File:Serpentine helm.png]] Serpentine helm or [[File:Helm of neitiznot.png]] Helm of Neitiznot
| |
| |-
| |
| |[[File:Neck slot.png|center]] || [[File:Salve amulet(ei).png]] Salve amulet (e) or (ei) || [[File:Amulet of torture.png]] Amulet of torture || [[File:Amulet of fury.png]] Amulet of fury || [[File:Amulet of glory.png]] Amulet of glory || [[File:Amulet of power.png]] Amulet of power
| |
| |-
| |
| |[[File:Cape slot.png|center]] || [[File:Infernal cape.png]] Infernal cape || [[File:Fire cape.png]] Fire cape || [[File:Max cape.png]] Max cape || [[File:Capes of accomplishments (trimmed).gif]] Cape of accomplishment || [[File:Mythical cape.png]] Mythical cape || {{NA}}
| |
| |-
| |
| |[[File:Body slot.png|center]] || [[File: Inquisitor's hauberk.png]] Inquisitor's hauberk / [[File:Torva platebody.png]] Torva platebody || [[File:Statius's platebody.png]] Statius's platebody || [[File:Bandos chestplate.png]] Bandos chestplate || [[File:Dharok's platebody.png]] Dharok's platebody (or Barrows platebodies) || [[File:Rune platebody.png]] Rune platebody
| |
| |-
| |
| |[[File:Legs slot.png|center]] || [[File: Inquisitor's plateskirt.png]] Inquisitor's plateskirt / [[File:Torva platelegs.png]] Torva platelegs || [[File:Statius's platelegs.png]] Statius's platelegs || [[File:Bandos tassets.png]] Bandos tassets || [[File:Dharok's platelegs.png]] Dharok's platelegs (or Barrows platelegs) || [[File:Dragon platelegs.png]] Dragon platelegs
| |
| |-
| |
| |[[File:Weapon slot.png|center]] || [[File:Dragon hunter lance.png]] Dragon hunter lance || [[File:Ghrazi rapier.png]] Ghrazi rapier || [[File:Chaotic rapier.png]] Chaotic rapier|| [[File:Zamorakian hasta.png]] Zamorakian hasta || [[File:Abyssal whip.png]] Abyssal whip
| |
| |-
| |
| |[[File:Shield slot.png|center]] || [[File:Avernic defender.png]] Avernic defender ||[[File: Dragon defender.png]] Dragon defender || [[File:Dragonfire shield.png]] Dragonfire shield || [[File:Rune defender.png]] Rune defender || [[File:Crystal shield.png]] Crystal shield
| |
| |-
| |
| |[[File:Ammo slot.png|center]] || {{NA}} || {{NA}} || {{NA}} || {{NA}} || {{NA}}
| |
| |-
| |
| |[[File:Hands slot.png|center]] || [[File:Ferocious gloves.png]] Ferocious gloves || [[File:Goliath gloves (black).png]] Goliath gloves || [[File:Barrows gloves.png]] Barrows gloves || [[File:Dragon gloves.png]] Dragon gloves || [[File: Rune gloves.png]] Rune gloves
| |
| |-
| |
| |[[File:Feet slot.png|center]] || [[File:Primordial boots.png]] Primordial boots || [[File:Steadfast boots.png]] Steadfast boots || [[File:Dragon boots.png]] Dragon boots || [[File:Guardian boots.png]] Guardian boots || [[File:Bandos boots.png]] Bandos boots
| |
| |-
| |
| |[[File:Ring slot.png|center]] || [[File:Berserker ring (i).png]] Berserker ring (i) || [[File:Ring of suffering (i).png]] Ring of Suffering (i) || [[File:Berserker ring.png]] Berserker ring || [[File:Ring of wealth (i).png]] Ring of wealth (i) || [[File:Ring of wealth (i).png]] Ring of wealth
| |
| |-
| |
| |[[File:Special attack orb.png]] || [[File:Crystal halberd.png]] Crystal halberd || [[File:Dragon claws.png]] Dragon claws || [[File:Dragon dagger.png]] Dragon dagger || [[File:Vesta's longsword.png]] Vesta's longsword || [[File:Armadyl godsword.png]] Any Godsword
| |
| |-
| |
| |}
| |
| </tabber>
| |
| </div>
| |
Revision as of 01:47, 23 August 2022
The Chambers of Xeric was the first Raid introduced into Old School Runescape that is composed of various puzzle rooms, monsters, and boss rooms. The difficulty of the raid is scaled by the number of players and combat levels. So the higher the combat level of the team is, the stronger the enemies will be.

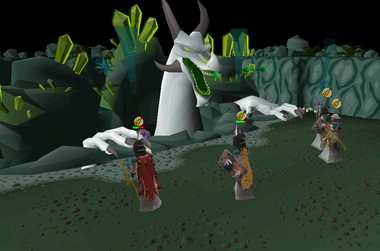
A group of players fighting the Great Olm.
 90+ Defence
 90+ Strength
 90+ Attack
 90+ Range
 90+ Magic
 90+ Hitpoints
 70+ with Piety unlocked.
  74+ unlocks Rigour and
  77+ unlocks Augury that are highly beneficial.
 70+ Woodcutting
 55+ if you are going to make supplies.
 78+ to make Xeric Aid's.
  90+ to make Overload+.
Chambers of Xeric Osrs/Normal mode
To start a raid, the leader must create a team. This team is the leader's 'friend chat'; which other players may join by manually typing in the channel's name.
There are two floors in a normal raid composed of puzzles/bosses and the final battle. One floor is composed of Tekton, Jewelled Crabs, Scavenger beasts, Ice demon, Lizardman shamans, and a resource room to make supplies. The second and final floor houses the final battle with the Great Olm.
Chambers of Xeric/Challenge Mode
Challenge Mode is a full raid version of the existing normal Chambers of Xeric. All combat and puzzle rooms are featured and the enemies themselves have significantly increased stats. The layout of each floor is consistent throughout all Challenge modes. Challenge mode is the only way to obtain a metamorphic dust to reskin an olmlet.
- Top level: Tekton, Jewelled Crabs, Scavenger beasts, Ice demon, Lizardman shamans, resource room
- Middle level: Vanguards, Thieving room, Scavenger beasts, Vespula, resource room, Tightrope room
- Lower level: Guardians, Vasa Nistirio, Scavenger beasts, Skeletal mystics, Muttadiles, resource room
 90+ Defence
 90+ Strength
 90+ Attack
 90+ Range
 90+ Magic
 90+ Hitpoints
 70+ with Piety unlocked.
  74+ unlocks Rigour and
  77+ unlocks Augury that are highly beneficial.
 70+ Woodcutting
 55+ if you are going to make supplies.
 78+ to make Xeric Aid's.
  90+ to make Overload+.