Difference between revisions of "Kalphite queen"
| Line 39: | Line 39: | ||
Ranged= | Ranged= | ||
{| class="wikitable | {| class="wikitable sticky-header" style=text-align:center; | ||
! <center>Slot</center> !! colspan="5"|<center>Item (most effective → least effective) </center> | ! <center>Slot</center> !! colspan="5"|<center>Item (most effective → least effective) </center> | ||
|- | |- | ||
|[[File:Head slot.png|center]]|| | |[[File:Head slot.png|center]] || {{plink|Masori mask}} || {{plink|Pernix cowl}} / {{plink|Crystal helm}} (if using full crystal armor and {{plink|Bow of faerdhinen}}) || See melee/mage sections | ||
|- | |- | ||
|[[File:Neck slot.png|center]] || | |[[File:Neck slot.png|center]] || {{plink|Necklace of anguish (or)}} || See: Melee/magic section | ||
|- | |- | ||
|[[File:Cape slot.png|center]] || | |[[File:Cape slot.png|center]] || {{plink|Completionist cape}} || {{plink|Ava's assembler}} | ||
|- | |- | ||
|[[File:Body slot.png|center]] || | |[[File:Body slot.png|center]] || {{plink|Masori body}} || {{plink|Pernix body}} / {{plink|Crystal body}} || {{plink|Armadyl chestplate}} | ||
|- | |- | ||
|[[File:Legs slot.png|center]] || | |[[File:Legs slot.png|center]] || {{plink|Masori chaps}} || {{plink|Pernix chaps}} / {{plink|Crystal legs}} || {{plink|Armadyl chainskirt}} | ||
|- | |- | ||
|[[File:Weapon slot.png|center]] || | |[[File:Weapon slot.png|center]] || {{plink|Twisted bow}} + {{plink|Toxic blowpipe}} ({{plink|Dragon darts}}) || {{plink|Zaryte crossbow}} / {{plink|Bow of faerdhinen}} || {{plink|Armadyl crossbow}} | ||
|- | |- | ||
|[[File:Shield slot.png|center]] || | |[[File:Shield slot.png|center]] || {{plink|Twisted buckler}} (only with a crossbow) || {{plink|Dragonfire ward}} || {{plink|Odium ward}} | ||
|- | |- | ||
|[[File:Ammo slot.png|center]] || | [[File:Ruby dragon bolts (e) 5.png]] Ruby dragon bolts (e) | |[[File:Ammo slot.png|center]] || {{plink|Dragon arrows}} / [[File:Ruby dragon bolts (e) 5.png]] Ruby dragon bolts (e) || [[File:Diamond dragon bolts (e) 5.png]] Diamond dragon bolts (e) || [[File:Ruby bolts (e) 5.png]] Ruby bolts (e) + [[File:Diamond_bolts_5.png ]] Diamond bolts (e) | ||
|- | |- | ||
|[[File:Hands slot.png|center]] || | |[[File:Hands slot.png|center]] || {{plink|Nefarious gloves}} || {{plink|Swift gloves}} || See: Melee/mage sections | ||
|- | |- | ||
|[[File:Feet slot.png|center]] || | |[[File:Feet slot.png|center]] || {{plink|Harmonized boots}} || {{plink|Pernix boots}} || See: Melee/mage sections | ||
|- | |- | ||
|[[File:Ring slot.png|center]] || | |[[File:Ring slot.png|center]] || {{plink|Hazelmere's signet ring}} || {{Archer ring (i)}} || {{plink|Ring of wealth (i)}} | ||
|} | |||
| | |||
Magic= | Magic= | ||
| Line 88: | Line 86: | ||
|[[File:Ammo slot.png|center]] || See [[#Ranged|Ranged]] || || | |[[File:Ammo slot.png|center]] || See [[#Ranged|Ranged]] || || | ||
|- | |- | ||
|[[File:Hands slot.png|center]] || {{plink|Nefarious gloves}} || {{plink|Tormented bracelet (or)}} || | |[[File:Hands slot.png|center]] || {{plink|Nefarious gloves}} || {{plink|Tormented bracelet (or)}} || {{plink|Tormented bracelet }} | ||
|- | |- | ||
|[[File:Feet slot.png|center]] || {{plink|Harmonized boots}} || {{plink|Battle-mage boots}} || {{plink|Boots of subjugation}} | |[[File:Feet slot.png|center]] || {{plink|Harmonized boots}} || {{plink|Battle-mage boots}} || {{plink|Boots of subjugation}} | ||
|- | |- | ||
|[[File:Ring slot.png|center]] || {{plink|Hazelmere's signet ring}} ||{{plink|Ring of wealth (i)}} | |[[File:Ring slot.png|center]] || {{plink|Hazelmere's signet ring}} || {{Seer's ring (i)}} || {{plink|Ring of wealth (i)}} | ||
|} | |} | ||
Revision as of 00:27, 24 March 2025
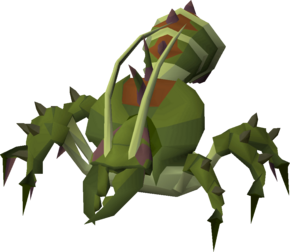
The Kalphite Queen, also called the KQ, is the strongest of the Kalphites. The Kalphite Queen is mostly known for her bulk drops in Potato Cactus and Wines of Zamorak, as well as the rare Keris Partisan. Overall, she is a very simple boss on Zeah that can be killed with few requirements.
Suggested Skills
Auras, Relics and Pet perks
- High Alch runes can be helpful to alch unneeded rune drops and increase gp per run.
Equipment
| See melee/mage sections | |||||
| See: Melee/magic section | |||||
| See: Melee/mage sections | |||||
| See: Melee/mage sections | |||||
| Template:Archer ring (i) | |||||
Magic=
Inventory
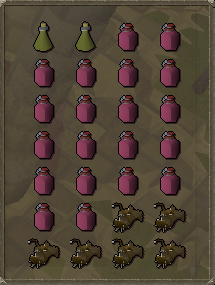
- 16-20 Super Restore (4) or Prayer Potion (4).
- Some food; 4-6 pieces of food in case you mess up the safespot.
- Rest of Inventory is Antidote++ / some form of Antipoison

Fight & Mechanics
The Mechanics
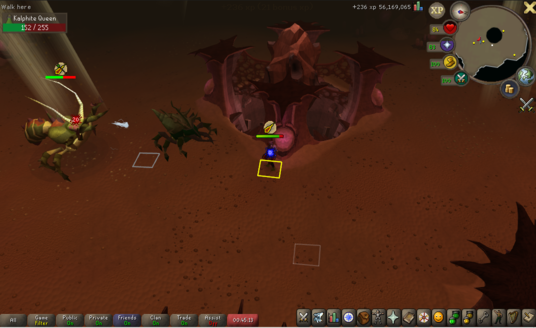
Kalphite Queen has two phases - Scarab Beetle and Giant Wasp. Don't take consideration of her overhead prayer, it ain't gonna impact your damage per second. All damage can be mitigated by praying protect mage and being at distance of the boss itself.
The Fight
Kalphite Queen is a very easy boss that can be killed with only Ranged. The three images demonstrate how to setup your character to not take any damage during the fight if you are using a ranged setup and have access to protect from magic.


